How to Fix a Squeaky Door Hinge (Without Losing Your Mind)
Advertisements
Here’s a fun fact — the average person opens and closes doors in their home about 20 times a day. Now imagine every single one of those times being accompanied by an ear-piercing squeak. That was my life for about three weeks last fall, and honestly, it nearly drove me insane!
I kept telling myself I’d get to it “tomorrow.” Spoiler alert: tomorrow turned into almost a month. But when I finally sat down and fixed that squeaky door hinge, it took me less than five minutes. Five. Minutes. So if you’re dealing with the same annoying problem, trust me — you can handle this.
Why Doors Squeak in the First Place
Before we jump into the fix, it helps to understand what’s actually going on. A squeaky hinge is usually caused by metal-on-metal friction, which happens when the lubrication between the hinge pin and the hinge knuckles dries out over time. Dust, rust, and general wear make it worse.
Sometimes the hinge pin itself gets slightly misaligned, especially in older homes where the door frame has settled a bit. I learned this the hard way when I was messing with my bathroom door and accidentally made the squeak louder — more on that disaster in a second.
What You’ll Need
The good news? You probably already have everything you need lying around the house. Here’s my go-to list:
- A lubricant — WD-40, white lithium grease, or even plain olive oil in a pinch
- A hammer and a nail or thin screwdriver (to remove the hinge pin)
- Paper towels or an old rag
- Steel wool or fine sandpaper (for rusty pins)
That’s literally it. No fancy tools, no trip to the hardware store.
The Quick Fix: Lubricating the Hinge
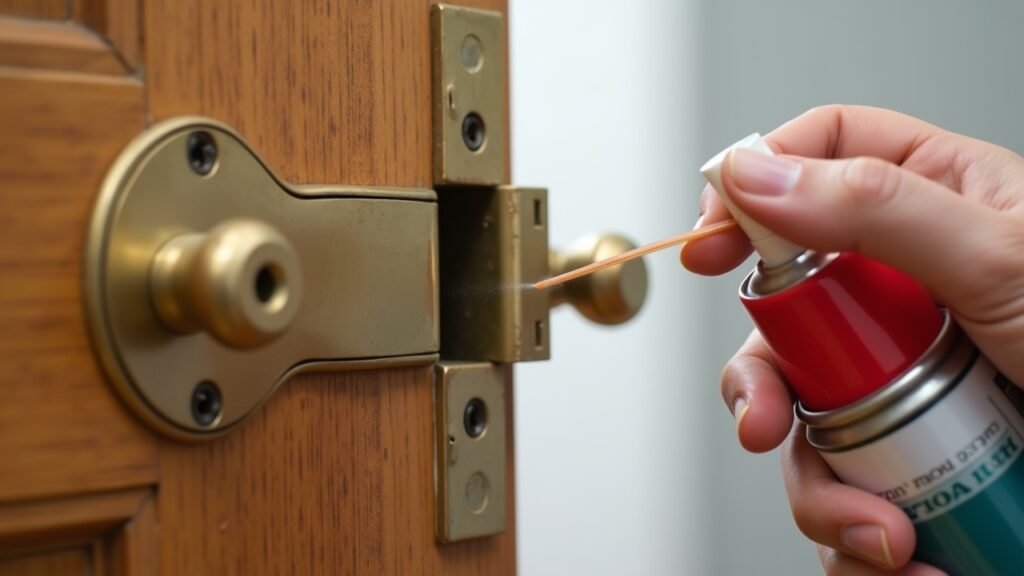
Okay so this is the method I use 90% of the time and it works like a charm. Start by closing the door most of the way so the hinge is accessible but the door stays in place.
Spray your lubricant directly into the top of each hinge, right where the pin sits inside the knuckle. Open and close the door a few times to work the lubricant in. Wipe off any excess with your rag so it doesn’t drip onto the floor — I forgot this step once and had an oily streak on my hardwood for days.
If WD-40 isn’t your thing, petroleum jelly works surprisingly well too. Just smear a little around the hinge pin area. It’s messier but honestly it lasts longer than most spray lubricants.
The Deep Fix: Removing the Hinge Pin
Now if the quick spray method doesn’t do the trick, you gotta go a step further. This is what finally solved my bathroom door nightmare.
Place your nail or thin screwdriver at the bottom of the hinge pin and gently tap it upward with the hammer. Once it pops up enough, pull it out with your fingers. Here’s where I messed up the first time — I tried to remove all three hinge pins at once, and the whole door just… fell. Caught it with my knee. Not fun.
So please, only remove one pin at a time. Once it’s out, check it for rust or buildup. If it looks rough, give it a good scrub with steel wool until it’s smooth again. Then coat it generously with lubricant or petroleum jelly and slide it back in.
Open and close the door a few times. The silence is genuinely beautiful.
Advertisements
Weird Household Hacks That Actually Work
I know this sounds ridiculous, but bar soap works in an emergency. Just rub it along the hinge pin before reinserting it. A friend of mine swears by cooking spray — the kind you use for pans. I tried it once and it did work, though it felt wrong somehow.
Wax from a candle is another old-school trick that’s been used for decades. Rub the wax directly on the pin and the inside of the knuckle. It creates a surprisingly durable barrier against friction.
Silence Really Is Golden

Look, a squeaky door hinge is one of those tiny household annoyances that you keep ignoring until it makes you want to scream. But fixing it is genuinely one of the easiest DIY tasks you’ll ever tackle. Whether you go with a quick spray or a full pin removal, the whole thing takes minutes.
Just remember to protect your floors from drips and never remove all the hinge pins at once — learn from my mistakes! If you enjoyed this little walkthrough, head over to the Nook Method blog for more practical home tips that won’t make your eyes glaze over.